Model Registry Service Runbook (Happy Path)
Overview
To “add” a user who can access Harbor via OIDC, it is necessary to create that user account within your OIDC identity provider such as Keycloak, Okta, Microsoft Entra, etc.
Base Harbor Registry Operations
OIDC User Login into Docker
After the first successful sign in and onboarding you can use the account credentials to login into your local Docker client. However you need to copy the secret code from the user profile popup window as depicted in figure below.
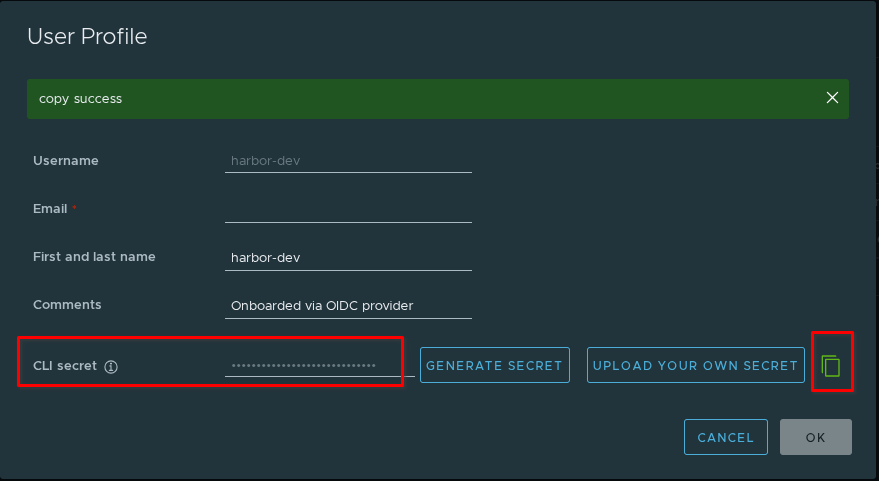
The CLI secret can be used as a password, for Docker or Helm clients. CLI secrets depend on the validity of the ID token and require the user to regularly log in to the UI to refresh the token.
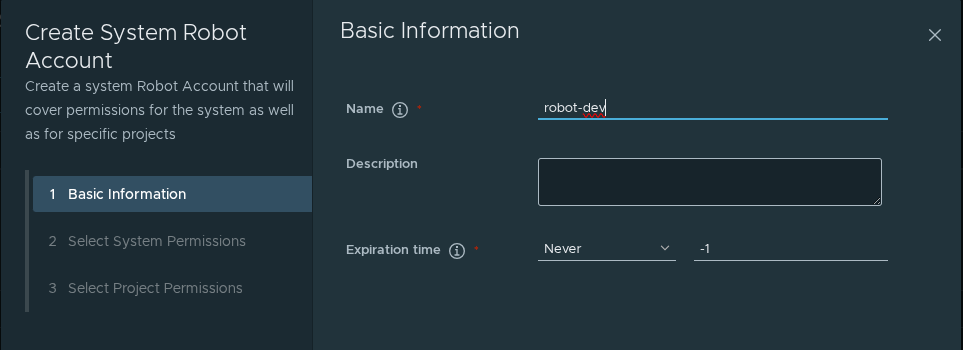
As an alternative way it is strongly recommended usage of robot accounts which can be created in the Harbor Administration console in the Robot Accounts section. A robot account creation wizard includes the token expiration settings and detailed permissions configuration.
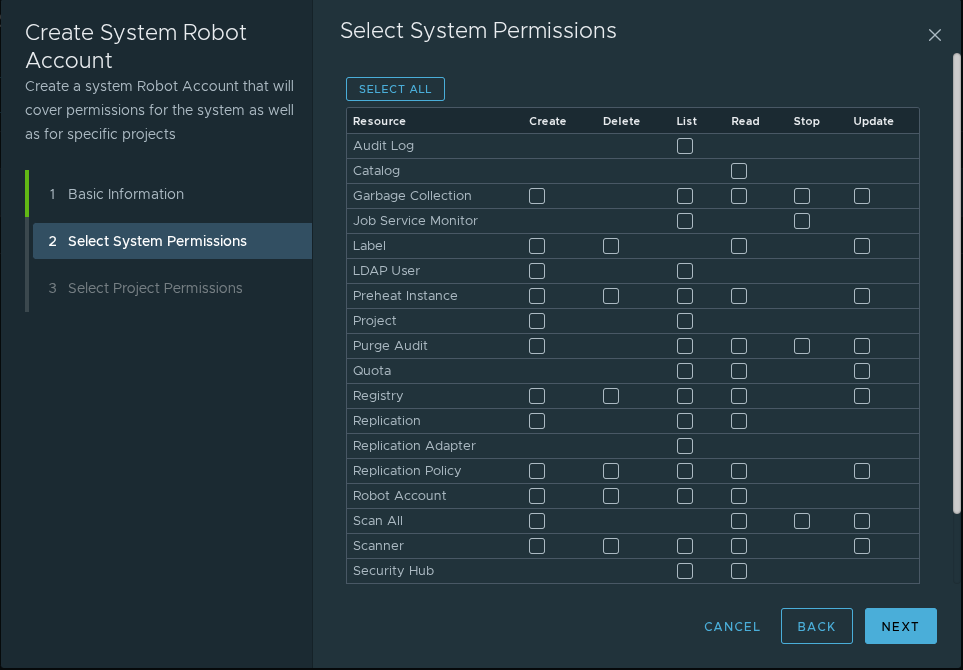
Robot account permissions setup
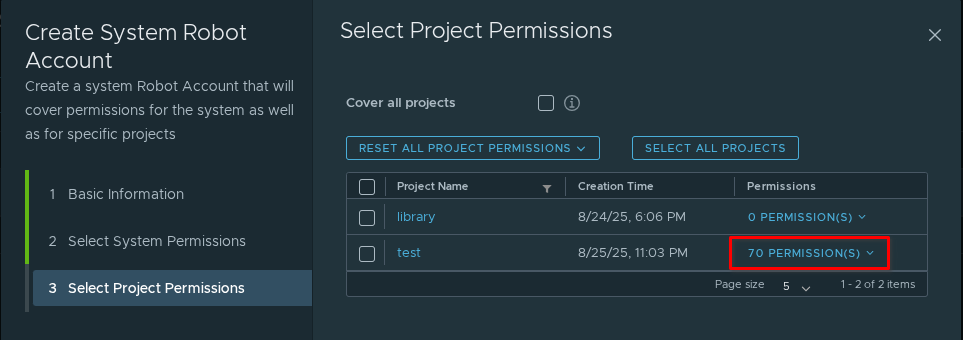
Project specific permissions configuration
Finally you can get the generated secret for the recently created robot account which can be used to sign in into the Harbor registry for automation and scripting.
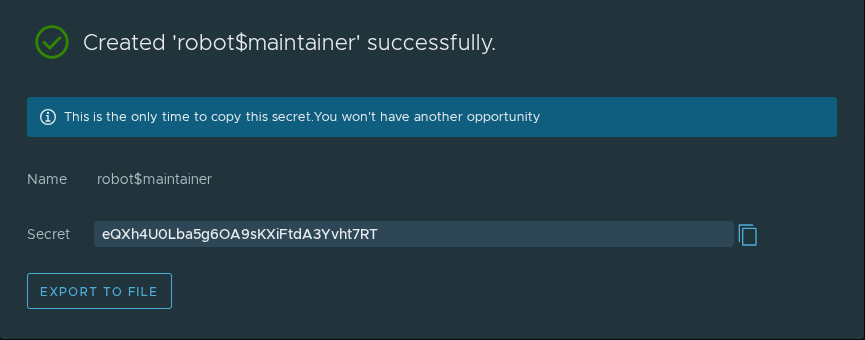
Also it is possible to download a json file with account credentials to secure it.
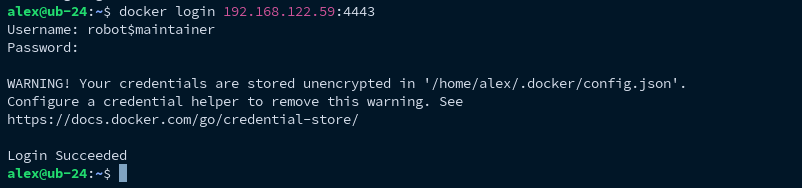
After that it’s possible to login into docker CLI using the generated user credentials.
Harbor and Docker Images List
If you have already pulled images from your Harbor registry to your local Docker client, you can use the docker images command to list them. This command only shows images present on your local machine, not all images in the Harbor registry.
To see a list of images in a Harbor repository, you can utilize the Harbor CLI, i.e. a command-line tool that simplifies interaction with Harbor by providing a text-based interface besides the Harbor User Interface (UI) and Harbor REST API:

The Harbor CLI can be downloaded from the Github Releases page.
Push Image to the Harbor Repository via Docker Client
Make sure that your robot or user account has sufficient rights to push artifacts to a Harbor repository.


Pull Image from the Harbor Repository using Docker Client

Create a New Project
In this scenario, we walk through the process of creating a new project while adhering to strict naming conventions according to the Harbor restrictions. Let's assume you're working with the provided API and want to create a new project named "my-new-project" which meets the specified criteria:
- Length Requirement: Between 1 and 255 characters inclusive.
- Allowed Characters: Lowercase letters, digits, periods (.), underscores (_), hyphens (-).
- Starting Character: Must begin with either a letter or digit.
Follow the steps outlined below to ensure compliance with the rules during a new project creation.
Step 1: Access Swagger UI
Navigate to the Swagger UI page that is available by the following link:
https://backend.dev.xavier.icvr.xyz/modelregistry/swagger/index.html
Step 2: Locate the POST /projects Endpoint
Find the section labeled “Project” and locate the POST /projects endpoint under it. Click on it to expand the details.
Endpoint: POST /projects
Step 3: Fill Out the Request Form
Under the expanded view, fill out the form fields with relevant information:
- Name: Enter the validated project name, i.e., "my-first-project".
- Display Name: Enter a descriptive name, e.g., "My First Project".
- Tenant ID: Specify the corresponding tenant ID (a tenant should be created preliminary).
- Description: Provide a brief summary, e.g., "This is my initial project setup.".
- Public Flag: Choose whether the project is public or private.
Here's an example configuration:
{
  "name": "my-first-project",
  "display_name": "My First Project",
  "tenantId": "your-tenant-id",
  "description": "This is my initial project setup.",
  "public": true
}
Step 4: Execute the Request
Click the "Try it out" button. After filling in the details, click "Execute" to submit the request.
Step 5: Inspect the Result
Check the response area for the results. If everything went correctly, you should see a 200 OK status code accompanied by the full representation of the newly created project:
{
  "id": "new-project-id",
  "name": "my-first-project",
  "displayName": "My First Project",
  "description": "This is my initial project setup.",
  "public": true,
  "tenantId": "your-tenant-id"
}
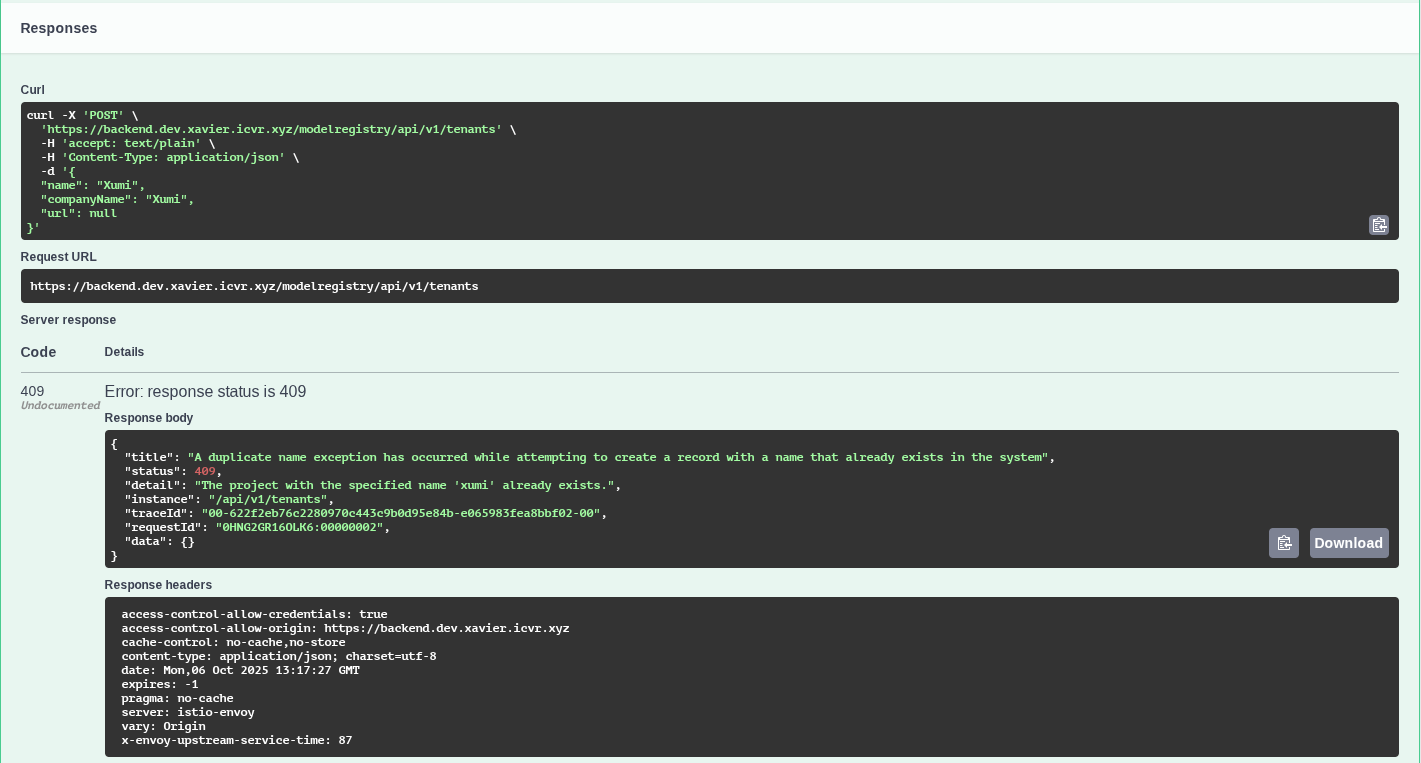
Handling Errors
If anything goes wrong (like an invalid token or improperly formatted request), the response will contain an error message explaining what's amiss. Common issues might involve:
- Invalid project names not matching the regex pattern.
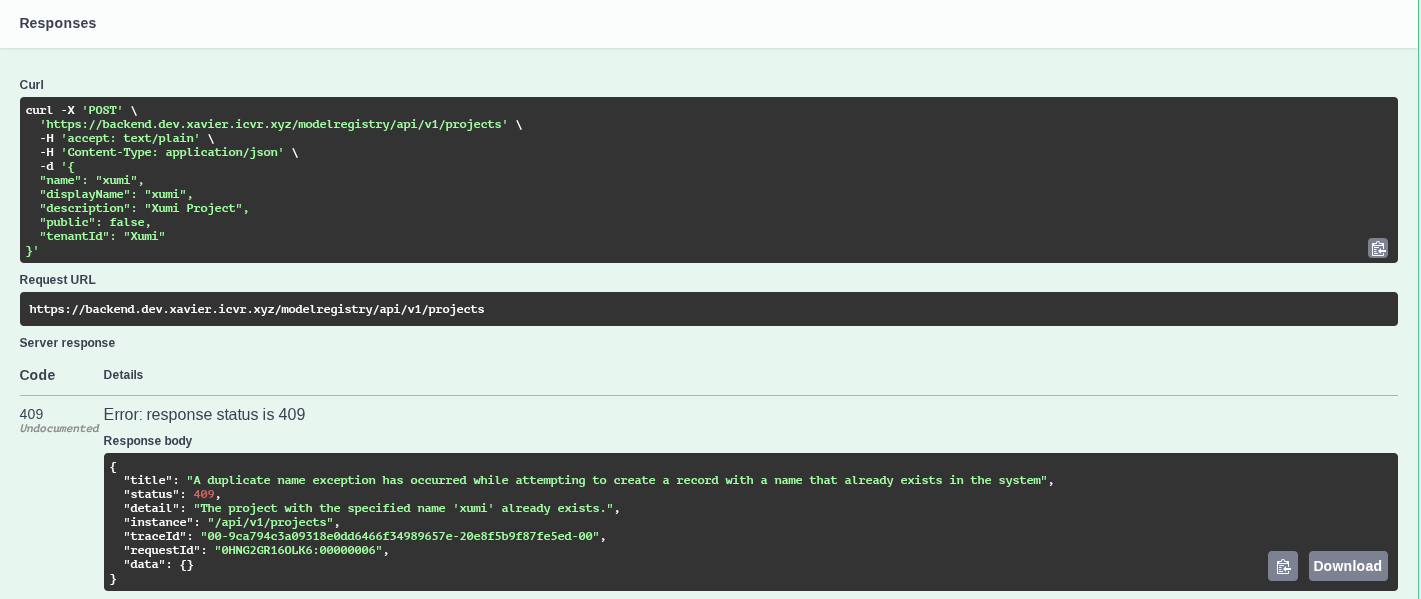
- A project with the specified name already exists
- Missing required fields.
- Incorrect permissions.
The example of the output in case when the project name is conflicted with an already existing project is depicted below.
Refreshing Model Data from Harbor Registry Using Swagger UI
To synchronize model data and refresh it from the original repository in the Harbor registry, we'll use the Swagger UI to interact with the API. The model data refresh may be useful in case when automatic data update based on a Harbor’s project webhook notifications failed or any discrepancy between the model’s data in Model Registry database and original Harbor’s repository occurs due to some reasons.
Prerequisites:
- Access to Swagger UI: Navigate to the Swagger UI page that is available by the following link: https://backend.dev.xavier.icvr.xyz/modelregistry/swagger/index.html
- Harbor Repository Information: Have the repository details as follows:.
- Project Identifier: Know the unique identifier (project Id) of the project where the model resides.
- Repository identifier: Corresponds to the repository name in Harbor registry where the model resides.
- Valid Token: Make sure your authorization token is active and valid.
Step 1: Identify the Relevant Endpoint
Locate the POST endpoint responsible for refreshing model data under the Model Management section.
Endpoint: POST /api/v1/models/ /
Step 2: Expand the Endpoint Details
Expand the endpoint to reveal further details, including parameter requirements and examples.
Step 3: Set Up the Request Parameters
You need two critical pieces of information:
- Project Id: UUID or project name
- Model name: target model name whose data needs synchronization.
Step 4: Submit the Request
With all fields populated, press the "Try it out" button. Then execute the request by clicking "Send Request".
Step 5: Review the Response
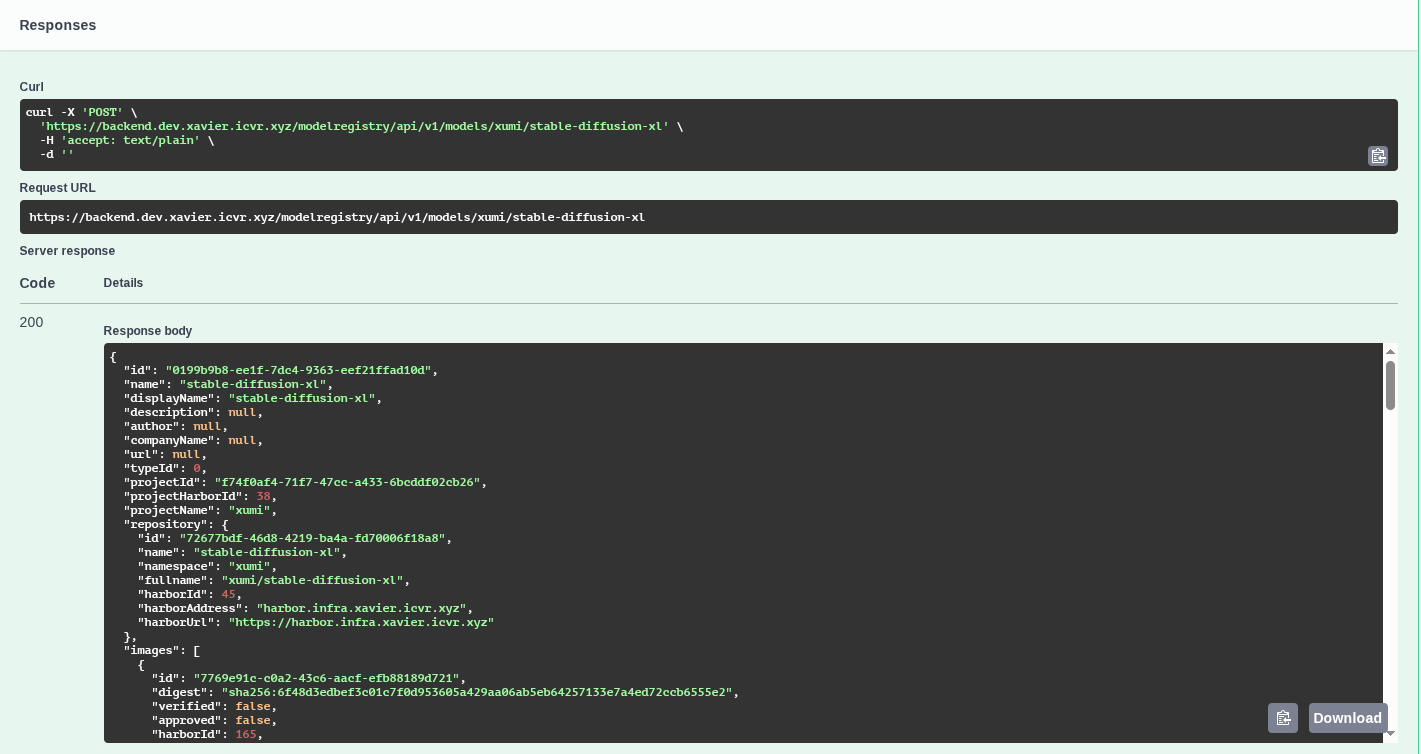
After execution, inspect the response. Successful synchronization results in a 200 OK status code with the refreshed model data output.
Expected Outcome:
- Success (200 OK): Model data updated successfully.
Registering the existing Harbor project in Model Registry through Swagger API
This scenario demonstrates how to integrate an existing Harbor project into the Model Registry by leveraging the Swagger API.
Prerequisites:
- Harbor Project Name: Know the exact name of the Harbor project you're trying to register.
- Access to Swagger UI: Ensure you have access to the Swagger UI provided by the Model Registry.
- Authorization Token: Have a valid JWT token for authenticating requests.
Step 1: Create New Tenant (Optional)
Before proceeding with project registration, ensure there's a suitable tenant for hosting the project. If one doesn't exist, create a new tenant using the POST /tenants endpoint.
Endpoint: POST /tenants
Payload Example:
Expected Outcome:
- Conflict (409): If a tenant with the same name already exists, but the corresponding tenant’s data was updated appropriately in the service database.
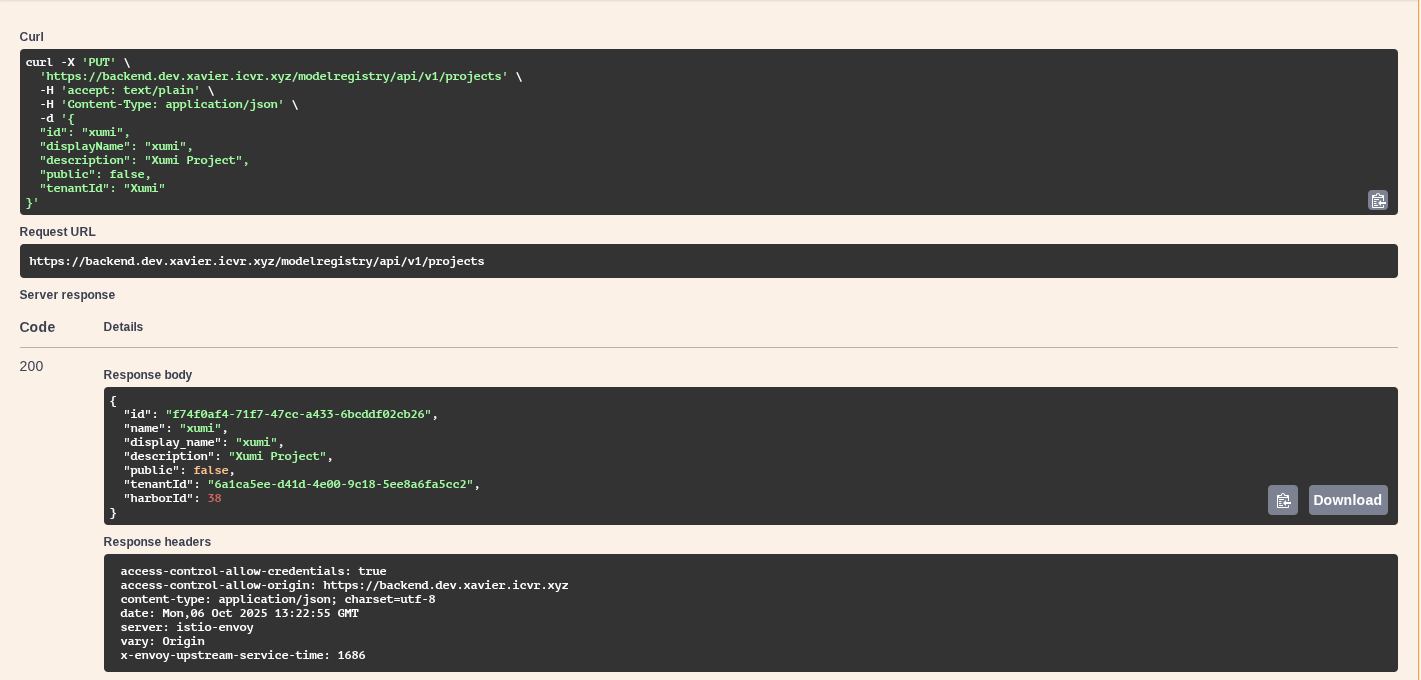
Step 2: Create Project with Same Name as Target Harbor Repository
Next, register a project in the Model Registry that mirrors the Harbor project. Since Harbor and Model Registry share different configurations, creating a project explicitly helps map the external repository to internal systems.
Endpoint: PUT /projects
Payload Example:
{
  "name": "existing_harbor_repo",
  "display_name": "Harbor Repo Sync",
  "description": "Synced harbor project",
  "public": true,
  "tenantId": "existing-tenant-id",
}
Expected Outcome:
- Success (200 OK): Project gets created or updated.
|Note: Resetting Harbor-specific project settings (project configuration, membership, webhooks) back to defaults is acceptable in this context.
Step 3: Synchronize Model Data by Project ID and Model Name
Finally, trigger a synchronization task to bring the model data from Harbor into the Model Registry. This ensures that the registry tracks changes in the Harbor repository accurately.
Endpoint: POST /api/v1/models/ /
Required Parameters:
- projectId: "your-project-id-from-step-2"
- modelName: "your-model-name-in-harbor-repo"
Expected Outcome:
Success (200 OK): The model data is synchronized, and the Harbor repository becomes trackable via the Model Registry API.
Final Notes
Following this procedure integrates Harbor repositories into the Model Registry, allowing centralized management and monitoring capabilities.