Getting Started with Telepresence
A beginner-friendly guide for connecting your local machine to services inside Kubernetes
Telepresence can feel a little mysterious the first time you hear about it. In practice, though, its purpose is very simple: it lets your local machine talk to services that normally live only inside a Kubernetes cluster. It as a client-to-cluster setup: you install a client on your machine, while the cluster already contains the server-side component that waits for connections.
This is especially useful when you need access to internal services that are not exposed outside Kubernetes. Instead of relying on traditional port-forwarding, which can be unstable, time out, or drop packets, Telepresence provides a more durable connection to the cluster.
What Telepresence Is For
In everyday development, the biggest value of Telepresence is convenience.
Without it, reaching an internal Kubernetes service often means finding the right pod or service, running a port-forward command, and hoping the tunnel stays alive. You may notice that this older approach can be unreliable: connections may be killed after a short timeout, packets may be lost, and strange errors can appear. Telepresence was introduced specifically to make this access more stable.
Once connected, you can often call services almost as if they were local network resources. That means tools like curl, Postman, or your own application can reach cluster services directly by name, without setting up a fresh port-forward every time.
What You Need Before You Begin
Before Telepresence can work, two things need to be in place.
First, you need the Telepresence client installed on your machine. Review the official installation docs for the client for more information.
Second, you need a valid kubeconfig for the cluster you want to use. In many teams, developers who already work with Kubernetes already have one, so this is often not an extra request. But it is still essential. Telepresence does not replace Kubernetes access; it works on top of it.
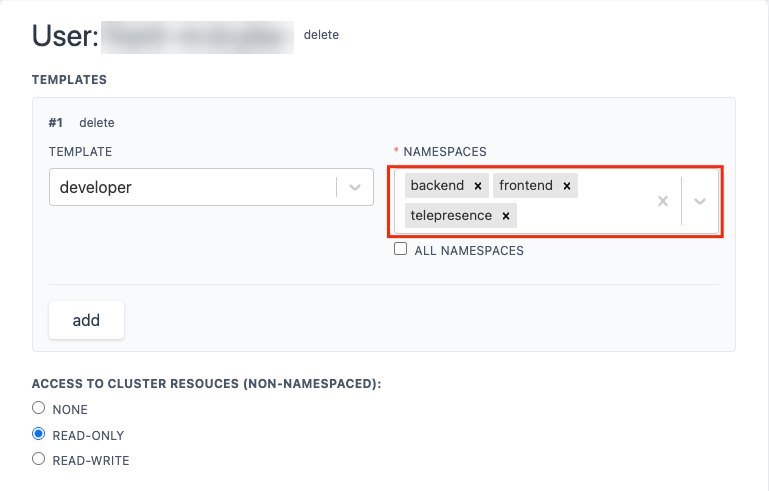
This also means access is controlled in two layers. Your kubeconfig defines which namespaces you are allowed to reach in the cluster, and Telepresence itself can also be configured to allow only certain namespaces. You must be allowed by both. If one side denies access, the connection will not work.
What is kubeconfig?
A kubeconfig file is (usually named config) is your access file for Kubernetes in YAML format file that that tells your tools (like kubectl or Telepresence):
- which cluster to connect to
- who you are (your credentials)
- what access you have (permissions)
- which environment you’re currently working with (context)
It contains three main things:
- Clusters: These are the Kubernetes environments you can connect to (dev, staging, prod, etc.)
- Users: Your authentication details (tokens, certificates, etc.)
- Contexts: A combination of cluster, user, and default namespace. This is what you actually switch between when working.
By default, it’s stored in ~/.kube/config, but you can also point to a different file using an environment variable KUBECONFIG=/path/to/your/config
The following screenshot shows namespaces available for Telepresence:
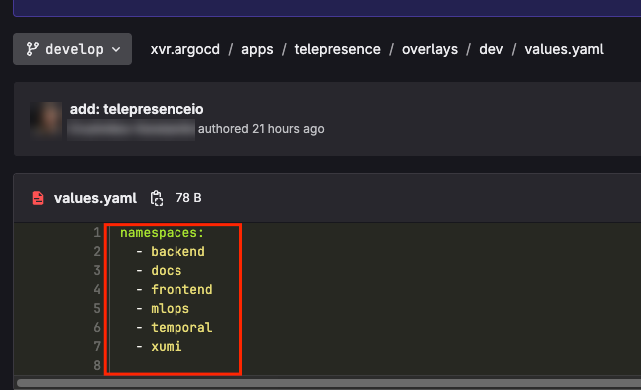
Access to the namespace is restricted to users with explicit permission, as demonstrated in the screenshot. To enable this connection, the telepresence namespace must be added to the user's kubeconfig file. Failure to do so will result in an error.
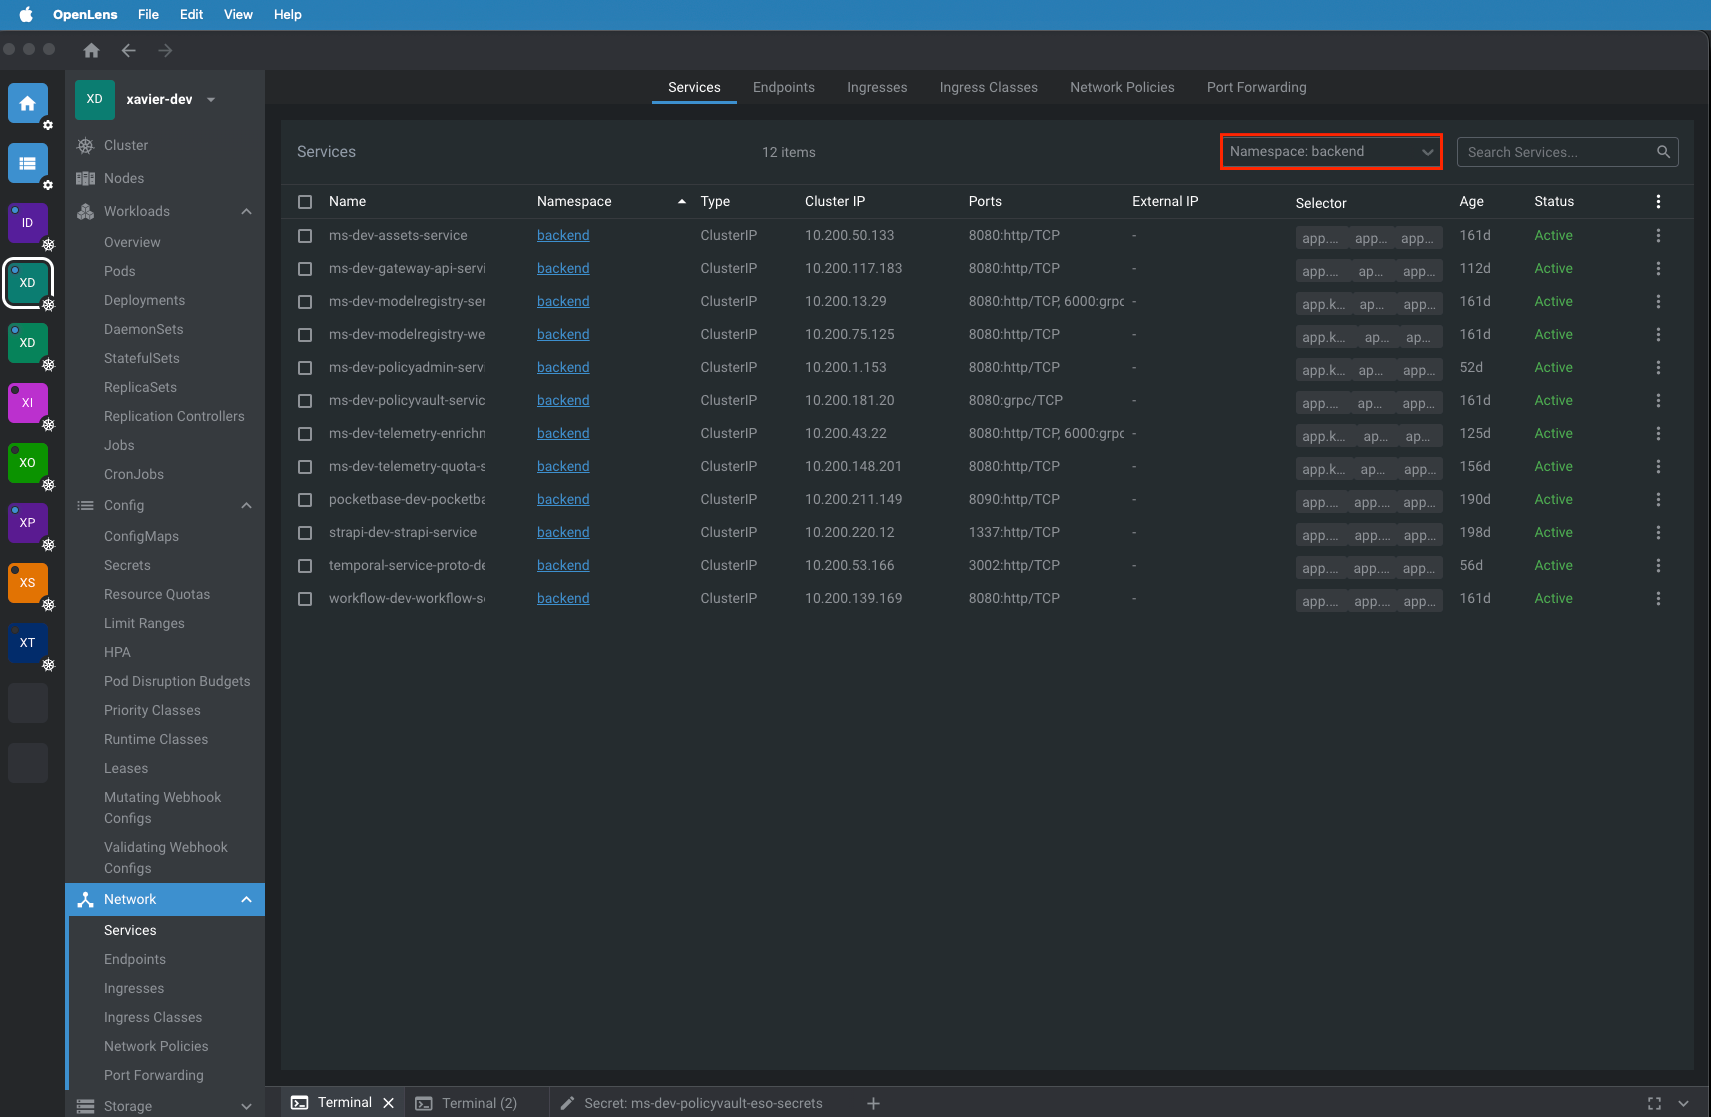
The following image shows services available for a certain namespace:
Installing the Client
Start with the official installation docs for the client and install Telepresence for your operating system.
After installation, run a command to verify that the binary is available:
If the command prints a version, the client is installed correctly.
The Main Connection Command
The core command you will use is telepresence connect. It has several important flags used with it:
--manager-namespacetells Telepresence where to find its server-side traffic manager in the cluster.--namespacedefines the main Kubernetes namespace you are connecting to.--mapped-namespaceslets you add extra namespaces on top of the main one.--contextlets you choose which cluster context from your kubeconfig should be used.
A typical command looks like this:
telepresence connect \
  --manager-namespace telepresence \
  --namespace backend \
  --mapped-namespaces frontend
This means:
You connect through the Telepresence traffic manager running in the telepresence namespace, your main working namespace is backend, and you also want access to services in frontend.
Your First Connection
Let’s walk through a beginner-safe example.
Suppose you want to work with backend services inside the cluster.
Run:
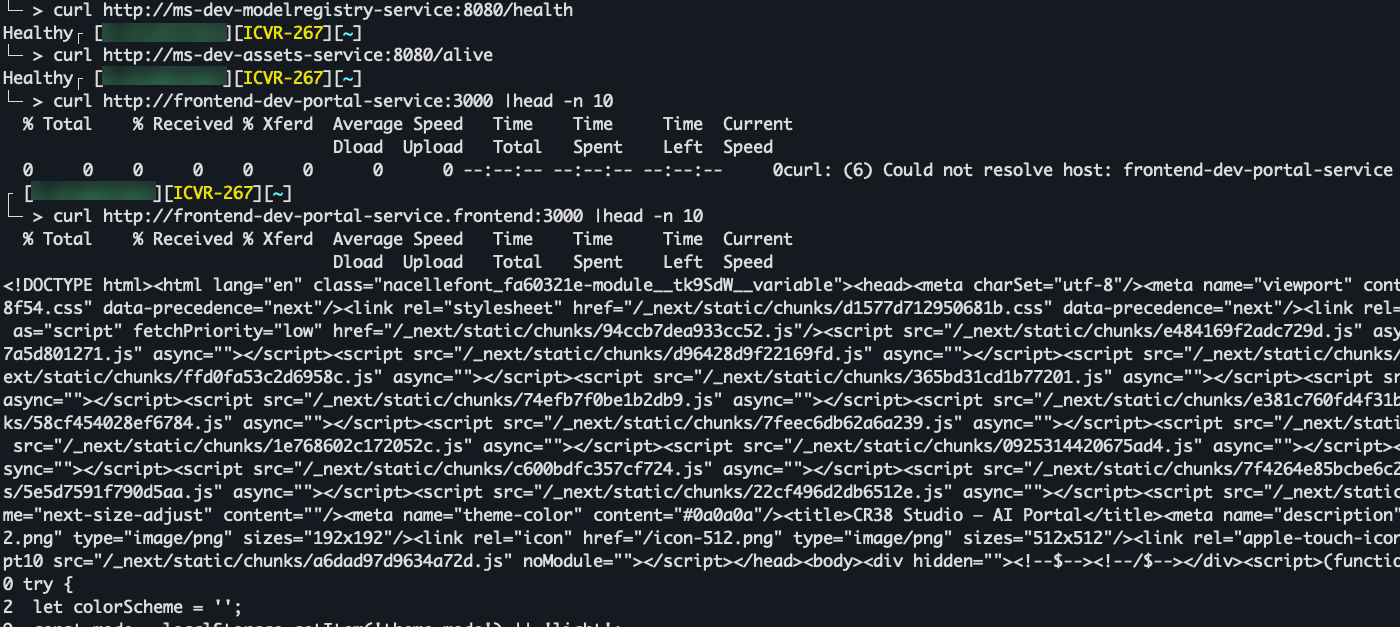
If everything is configured correctly, Telepresence establishes the connection and your machine begins resolving services from the backend namespace more naturally. Once connected to the main namespace, services in that namespace can be reached simply by their service name.
For example, if there is a service named api-service in backend, you may be able to call it like this:
That is one of the main quality-of-life improvements: instead of memorizing a port-forwarded localhost port, you work with the service more directly. For example, developers can call services by name from tools like Postman.
Main Namespace vs Mapped Namespaces
This is one of the most important concepts for new users.
When you connect with --namespace backend, that namespace becomes your main namespace. Services inside it can usually be reached by simple name.
When you add --mapped-namespaces frontend, Telepresence also makes that namespace available, but with a catch. The source explains that services from mapped namespaces usually cannot be reached by simple service name alone. Instead, you need to include the namespace in the host name.
So this may work for a backend service:
But for a frontend service in a mapped namespace, you would need something like:
The source is very clear on this distinction: for the main namespace, the short name is enough; for mapped namespaces, you need the service name plus the namespace.
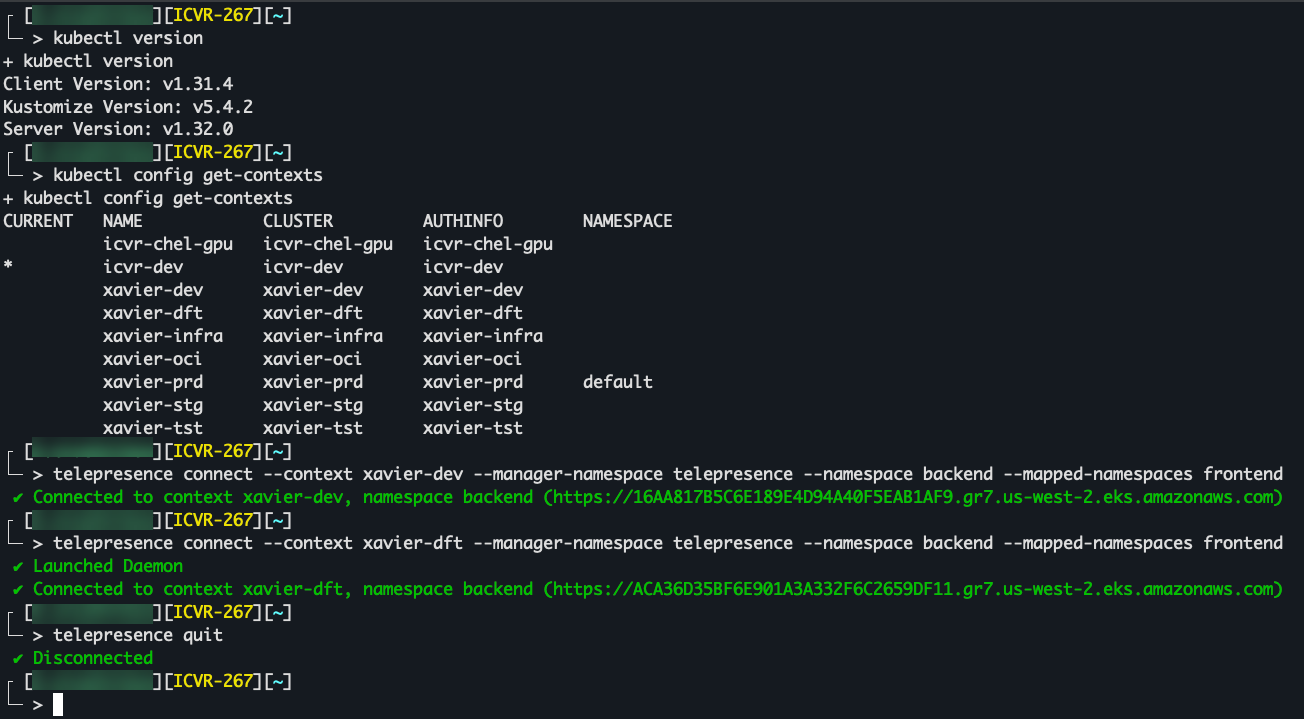
Connecting to a Specific Cluster Context
Many developers work with more than one cluster, such as dev, draft, or stage. The source explains that one kubeconfig can contain multiple contexts, and Telepresence supports switching between them.
You have two common options.
One approach is to preselect the context with kubectl:
kubectl config use-context dev-cluster
telepresence connect \
  --manager-namespace telepresence \
  --namespace backend
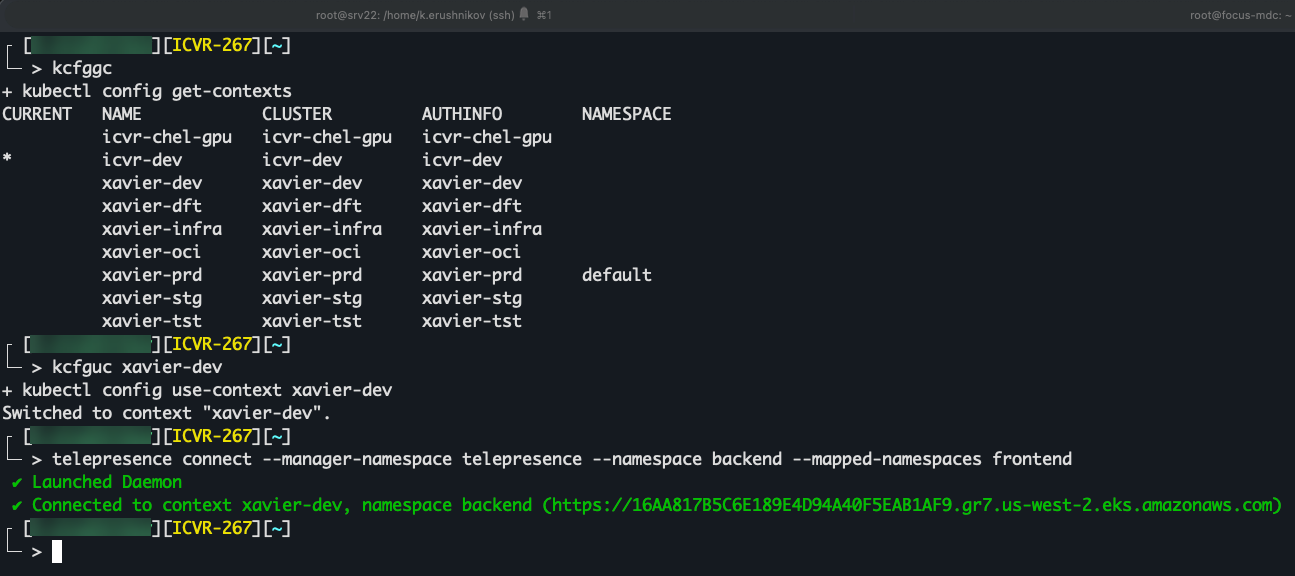
Another approach is to specify the context directly in the Telepresence command:
telepresence connect \
  --context draft-cluster \
  --manager-namespace telepresence \
  --namespace backend
For a beginner, the second option is often clearer because the command itself shows exactly which cluster is being targeted.
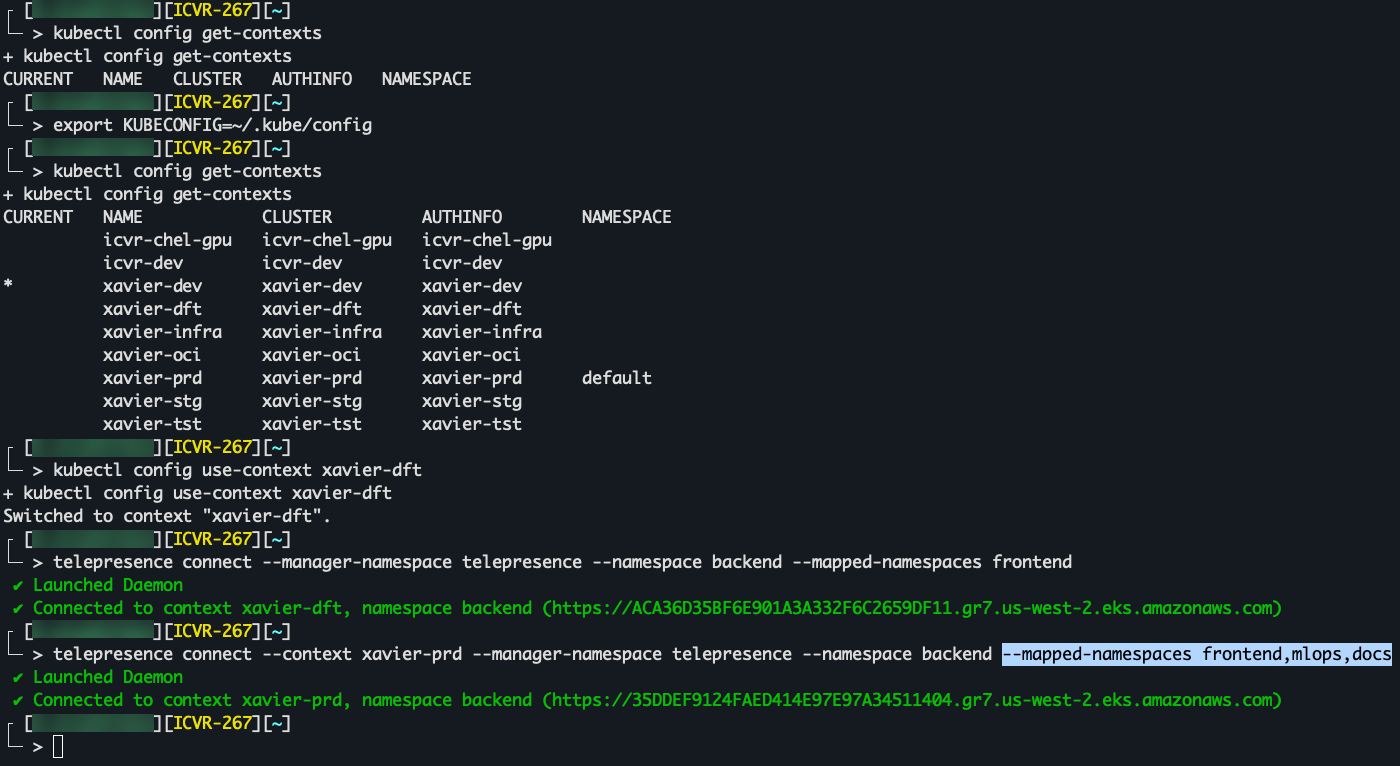
When KUBECONFIG Is Missing or Stored Elsewhere
Sometimes Telepresence or kubectl does not “see” your cluster at all. This can happen if the kubeconfig file is not in the standard location or if the KUBECONFIG environment variable is empty or not set.
You can set it manually.
On macOS or Linux:
Then check which contexts are available:
After that, connect as usual:
telepresence connect \
  --context dev-cluster \
  --manager-namespace telepresence \
  --namespace backend
Place the kubeconfig where the system expects it, or explicitly point to it through the environment variable.
Using Telepresence to Reach Databases and Other Internal Services
Telepresence is useful not only for HTTP services but also for databases and other internal resources that are available only inside Kubernetes.
If a database service exists in a namespace you can access, you connect to it by service name and port.
For example:
Here, postgres-service is the Kubernetes service name, sql is the namespace, and 5432 is the port. This follows the same namespace-resolution rules described in the source.
A Common Error You May See
An example of an error:
telepresence connect: error: TRANSIENT_FAILURE: the port-forward connection to the traffic manager timed out.
The current timeout 1m0s can be configured as "timeouts.trafficManagerConnect"
This usually means Telepresence could not reach its traffic manager in the cluster. One common reason is that the required namespace is not allowed in your kubeconfig or not permitted by the Telepresence server-side configuration.
If you see this kind of error, do the following. Make sure your kubeconfig is valid, make sure the telepresence namespace is accessible to your user, and make sure you are using the correct cluster context.
A Few Practical Command Examples
Here are a few beginner-friendly patterns based on the source material.
Connect to the backend namespace:
Connect to backend and also map frontend and mlops:
telepresence connect \
  --manager-namespace telepresence \
--namespace backend \
--mapped-namespaces frontend,mlops
Connect to a specific cluster context:
telepresence connect \
  --context dev-cluster \
  --manager-namespace telepresence \
  --namespace backend \
  --mapped-namespaces frontend
Call a service from the main namespace:
Call a service from a mapped namespace:
How to Disconnect
When you no longer need access, simply stop the Telepresence session:
This cleanly closes the connection to the cluster. It is the normal way to disconnect if you do not want to wait for the session to disappear on reboot.
A Good Mental Model to Keep
If you are new to Telepresence, the easiest way to think about it is this:
Your laptop temporarily becomes a better citizen of the cluster network.
You still need proper Kubernetes access. You still need the right context and namespaces. But once connected, working with internal services becomes much smoother than repeated port-forwarding.
Start small. Connect to one namespace. Test one service with curl. Then add mapped namespaces only when you need them.
That way, Telepresence stops feeling like Kubernetes magic and starts feeling like a very practical developer tool.